

Classes & combat
Awakening and the Shard Board
Your ultimate wakes twice, at levels 130 and 150, and every level from 121 to 160 gives a Shard to spend on a board.
Past level 120 you earn no new skill points. Two things take their place: Awakening, which changes your ultimate, and the Shard Board, which you fill one Shard at a time.
Awakening
Your tier 4 ultimate wakes twice during the story. No new button and no skill points are involved. The ultimate you already use gets stronger.
- Awakening I comes at level 130, in the story quest
 The First Shard. Your ultimate hits harder, and a shadow twin of you strikes the same targets a moment later.
- Awakening II comes at level 150, in The Second Shard. Your ultimate gains one more effect that depends on your path.
Each step counts from its level. If you finish the quest early, the bonus waits until you reach 130 or 150. In the Arena the twin's strike is halved.
What Awakening II adds
| Path | The ultimate gains |
|---|---|
| Sunguard | Leaves the ground sun-scorched for 4 seconds. Allies in it deal 8% more damage |
| Dragoon | A little shorter cooldown and one more dive |
| Astral | Two more falling stars and some MP back |
| Star Monk | Two more fists and a Constellation charge |
| Skywarden | The storm pulls enemies toward its centre |
| Marksman | Two more bolts and extra crit for that cast |
| Reaper | Finishes a non-boss foe it leaves under 8% HP |
| Dancer | A shorter cooldown |
| Wildheart | Heals the party over 4 seconds |
| Harbinger | Poison lasts 3 seconds longer and jumps to two foes nearby when its carrier dies |
The shadow after the story
When you finish The Ninth Gate, your hero casts a visible shadow in the world and inside your Starhaven. You can switch it off in Settings. The Cash Shop sells colours for it, and for your Awakening twin. See  The Cash Shop.
The Shard Board
You earn one Shard for every level from 121 to 160, forty in all. Open Stats and press SHARDS. The board has four columns, one + on each, and an AUTO button, much like your stat points.
Each Shard raises one branch by one rank. A branch has 15 ranks, and you can only fill forty of the sixty, so you must choose.
| Branch | Each rank | The Great Shard at rank 10 |
|---|---|---|
| Might | More damage | The Ninth Cut: now and then a hit adds a shadow strike |
| Bulwark | More max HP and defence | Hold the Gate: below 30% HP, you take less damage |
| Hunt | More boss damage and faster BREAK | Breaker's Patience: a boss you break stays broken a little longer |
| Fortune | More EXP and lumens from kills | Light Jar: a higher item drop rate |
Each rank has a short name from the Order's soldiers at Highwatch. Tap a rank to read it. Nothing needs hover.
Spending Shards
- Tap + to spend. A choice you make is always kept.
- AUTO spends every waiting Shard by your own order. Pick the order in CUSTOMIZE AUTO. Until you change it, the order is Might, Hunt, Bulwark, Fortune. A Shard you already hold is spent on your next level up, never in the middle of a fight.
- The Arena strips the board, like Sigils, so a duel stays even.
Resetting the board
Your first reset is free. Each later reset costs 5  Unlit Shards. They come from:
- the weekly Mirror, see
 The Unlit Challenges;
- the raid,
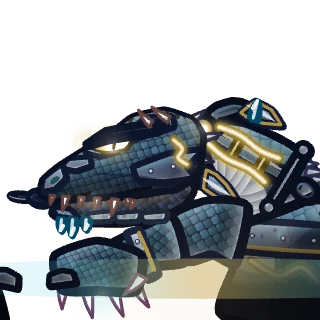 Vyrmholt;
- the exchange of the party quest The Ninth Stand;
- the realm's weekly goal, see
 The Thaw.
An Unlit Shard is never sold for money.
Tips
Read next
 The UnlitThe expansion for levels 121 to 160. Three new lands, new gear and creatures, and what to do at every step.Skills and Skill PointsThe skill tree, how Skill Points are earned per job, ranks, prerequisites, permanent EFFECT picks, buffs and buff macros.Stats and Ability PointsSTR, DEX, INT and LUK, what each class wants, how AP and AUTO assign work, and every other number on your Character window.Classes and JobsThe five classes, their two paths each, the four advancements, and how to try every class before you choose.Lumens and StarshardsEvery kind of money in Lumenfall, how to earn it, and where to spend it.
